Events [translations pending]

Here you can find out everything you need to know about creating and administrating events in guestoo.

Du kannst für das guestoo Back-End zwischen zwei Darstellungsoptionen wählen. Die Screenshots in der Doku basieren auf dem "Klassischen Design".
Hier siehst Du die Unterschiede, damit Du dich auch im "Modernen Design" zurecht findest: » guestoo Back-End-Design


Create event

Click on the “Create event” button to create a new event.


You can find a quick explanation on how to create a simple event in our tutorial: Simple event

Search and filter events

Search and filter events -

In the event list, you have the option of searching for specific events or filtering the event list.

Search event

In the search field, you can enter a specific criteria according to which the list should be searched, e.g. the name of the event, a specific date, the location, etc. This is helpful if you are looking for a specific event or only want to see events taking place at a specific location.

Filter event list

To the right of the search field there is another field that allows you to filter the event list.

Clicking on this field will offer you the following filter options:

  • Only today's events
  • Show events from / until
  • Keywords
  • Campaigns
  • Status
    • All
    • Public
    • Private
    • Offline
  • Type of event
    • All
    • Event
    • Preset 
    • System preset
    • Deleted
      Displays all events that have been deleted within the last 24 hours and can therefore still be restored.
Important notes on the filters
  • The filters set in the event list remain active until you deactivate them again (even after logging out)!
  • If you want to see all events, but notice that some events do not appear in the event list, please check that no filters are set!
  • In order to deactivate the selected filters again, click on the red “X” symbol in the “Filter list” field

Event-Limit erhöhen

Event-Limit erhöhen -

Below the search and filter bar, you will see a notice about the number of events that are included in your selected guestoo subscription.

If the displayed message is gray, you are within the limit set by the subscription. If it is orange, you have already exceeded the limit.


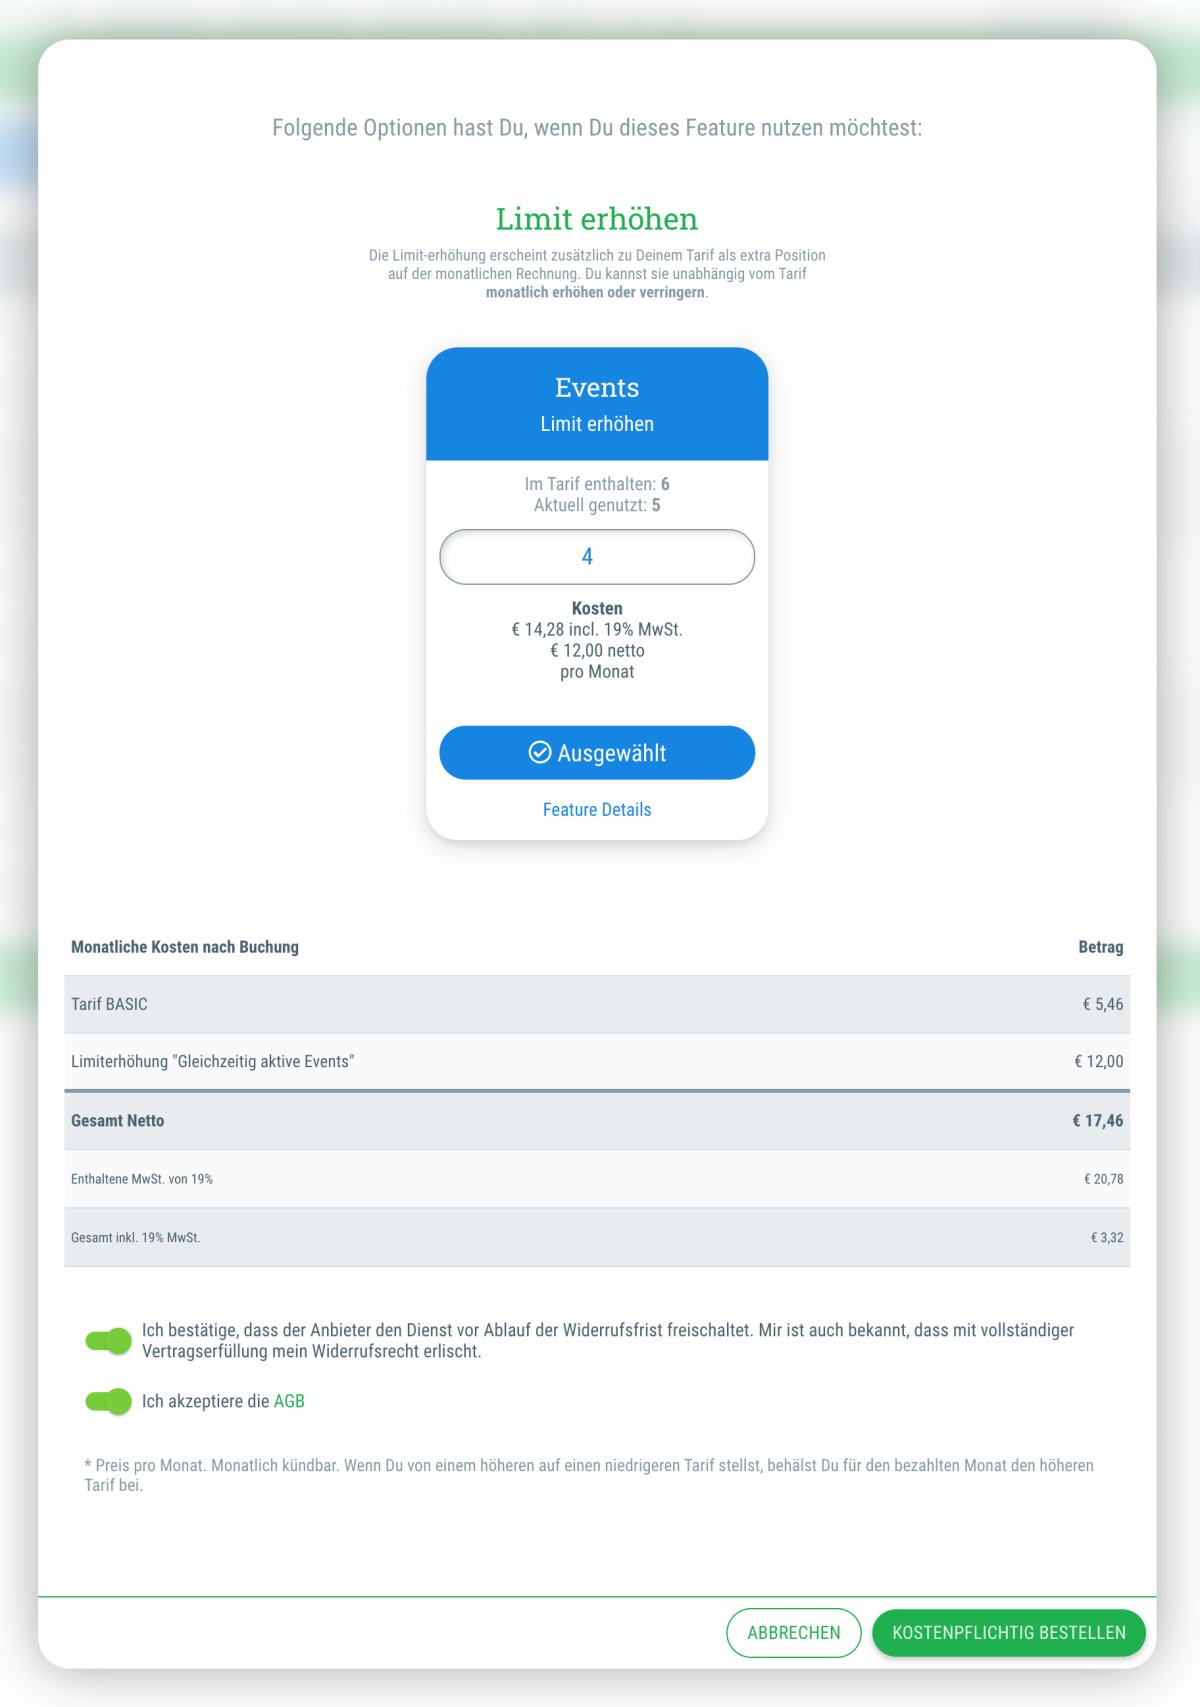
If you need more than the included number of events for your planning, you can raise this limit yourself.


This is how it works:

  • Klicke auf den "Anpassen"-Button in der Meldung 
  • Lege im Dialog-Fenster fest, wieviele Events Du hinzubuchen möchtest
  • Beispiel: Wenn 6 aktive Events in Deinem Tarif enthalten sind, Du aber 10 Events benötigst, trägst Du den Wert "4" ein
  • Alternativ hast Du auch die Möglichkeit in einen höheren Tarif mit einem höheren Event-Limit zu wechseln
  • Bestätige die beiden Einverständnisse
  • Klicke auf "Kostenpflichtig bestellen"
Wichtige Hinweise
  • Wenn Du das Event-Limit erhöhst und anschließend in einen niedrigeren Tarif wechselst, bleibt das gesetzte Limit erhalten

    Beispiel:
     Du hast im Pro-Tarif (10 Events enthalten) 5 weitere Events hinzugebucht. Wechselst Du im Anschluss in den Basic-Tarif (6 enthaltene Kontakte), bleiben die 5 hinzugebuchten Events erhalten und Du hast ein Limit von insgesamt 11 Events

  • Wenn Du das Event-Limit erhöhst und anschließend in einen höheren Tarif wechselst, wird das hinzugebuchte Event-Limit entsprechend verringert bzw. entfernt.

    Beispiele:
    • Du hast im Basic-Tarif (6 Events enthalten) 4 weitere Events hinzugebucht, um auf insgesamt 10 Events zu kommen. Wechselst Du in den Pro-Tarif (10 Events enthalten), verschwindet die Position komplett von der Rechnung.
    • Du hast im Basic-Tarif (6 Events enthalten) 5 weitere Events hinzugebucht, um auf insgesamt 11 Events zu kommen. Wechselst Du in den Pro-Tarif (10 Events enthalten), verringert sich die Anzahl der hinzugebuchten Events, die Du bezahlen musst, auf 1.


Manage events

Manage events -

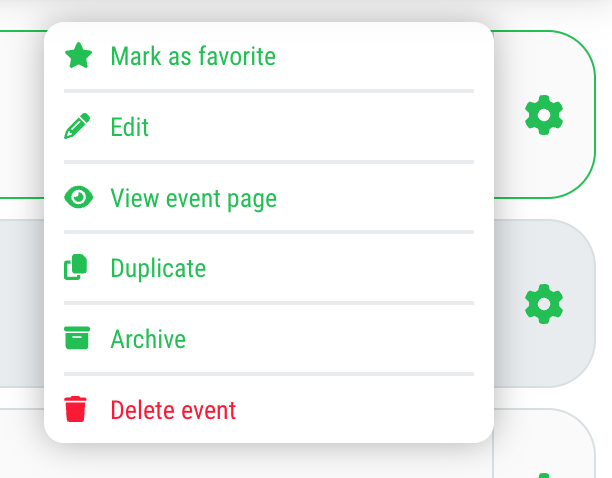
You will find a gear icon next to each event, which offers you various options for managing your event:

  • Mark as favorite
    Use this option to mark the event as a favorite. The event will then always be displayed at the top of the event overview and will not be hidden by any filters you may have set. You can mark as many events as you like as favorites. The marking of favorites applies per user - you only make this setting for your user account.
  • Edit
    Redirects you to the editing mode of the event
  • View event page
    Opens the event page in a new tab
  • Duplicate
    If you click on this menu item, you will be redirected to the creation of a new event that already contains all the settings of the event that you have selected for duplication. In this step, as well as afterwards, you have the option of changing individual settings for the event.
  • Archive
    If you click on this menu item, a dialog window opens in which you must confirm the archiving of the event. Archived events are automatically set to “Offline” status and do not appear in the event overview. To display archived events, you must filter the event list accordingly (see Search and filter events)

    Note:
     To remove an event from the archive so that it is displayed in the regular overview, click on the gear icon next to the event and select the option “Unarchive"
  • Delete event
    Here you can delete the event. You must confirm the deletion in a dialog window, where you'll also have the option of informing the guests who have already been added about the deletion of the event.

    Note: To restore a deleted event, set the filter in your event overview so that only events with the status “Deleted” are displayed (see Search and filter events). By clicking on the gear icon next to the deleted event, you can restore the event within 24 hours of deletion before it is irretrievably deleted.