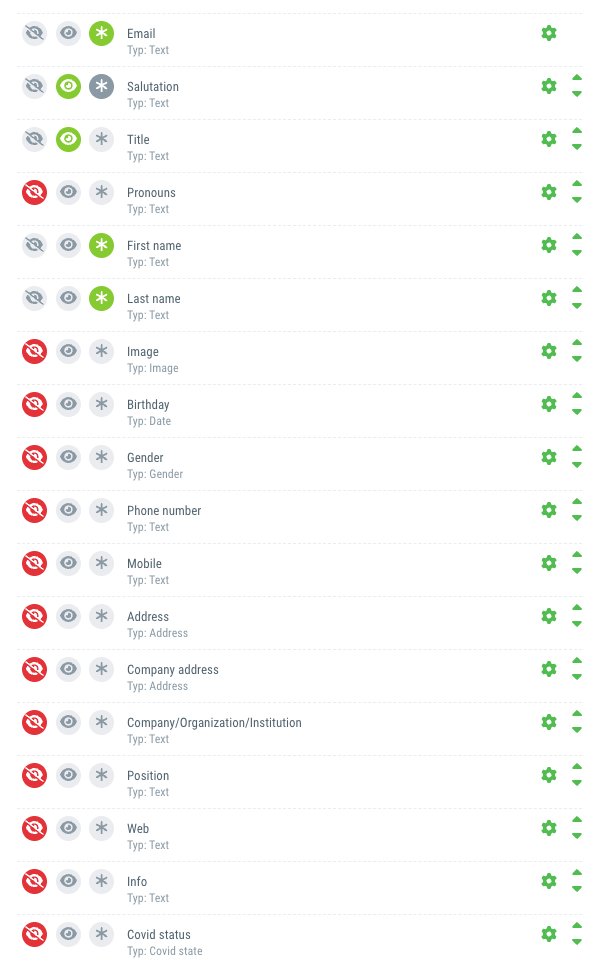
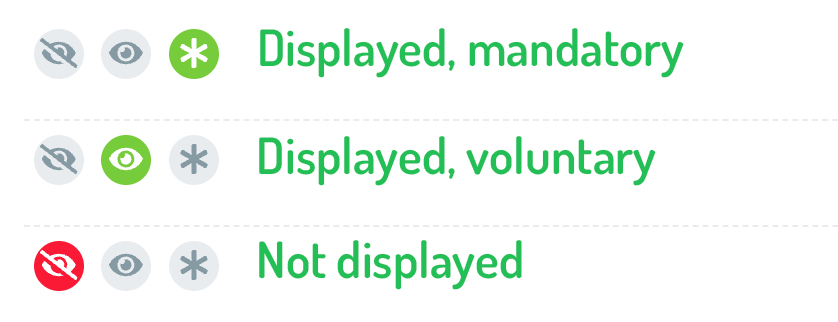
Here you can select which master data fields should be displayed to your guests in the registration form and whether or not they are mandatory.
Symbols
Red crossed-out eye = field is not displayed to the guest in the registration form
Green eye = Field is displayed to the guest in the registration form, information voluntary
Green star = mandatory field, mandatory!
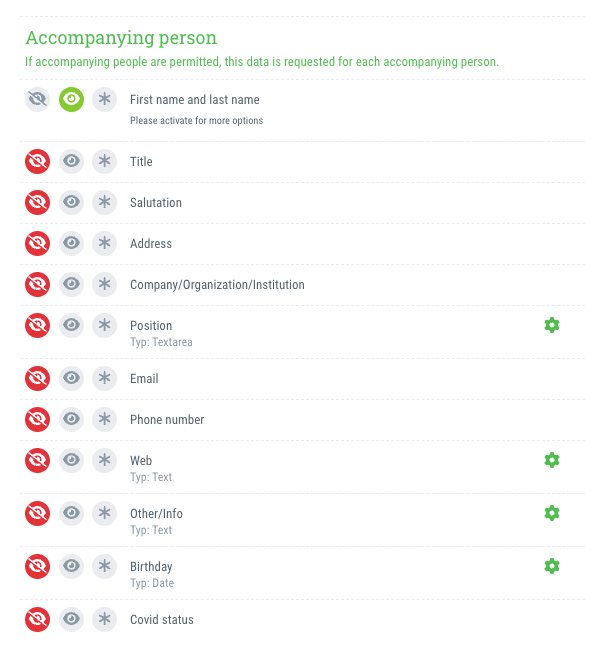
All master data listed here refers to the main guest who signs up for the event:
- Email
Input field for the email address, error message if the email address does not contain an @ - Salutation
Selection between “Mr.”, “Ms.” and “Non-binary/other”, free text input possible - Title
Various titles are available for selection here, but it is also possible to enter free text - Pronouns
The options “he/him”, “she/they”, “they/them”, “other” and “none” are available here, but guests can also enter their own free text - First name
Input field for the first name - Last name
Input field for the last name - Image
An upload is displayed where guests have the option of uploading a file - Birthday
Input field for the date of birth in the format DD.MM.YYYY
Note: By clicking on the cogwheel symbol next to the birthday, you can specify a minimum age and a maximum age for registering for the event. If the main guest is younger or older than the age group you have specified, registration for the event is not possible! - Gender
Choice between "Male", "Female" and "Non-binary/Other" - Phone number
Selection of the country code and input field for the telephone number - Mobile
Selection of the country code and input field for the mobile phone number - Address
Input fields for street, house number, zip code and city, selection menu for the country - Company address
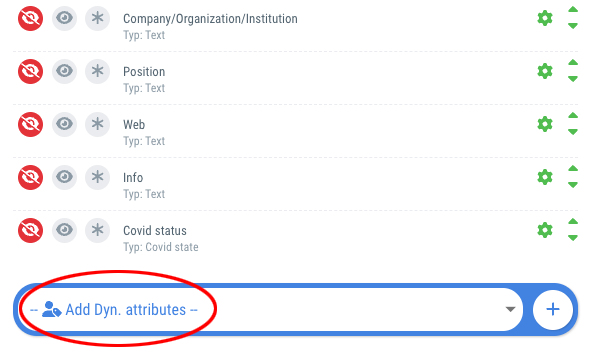
Input fields for street, house number, zip code and city, selection menu for the country - Company/Organization/Institution
Input field for the name of the company/organization/institution - Position
Input field for the guest's position - Web
Free text input field - Info
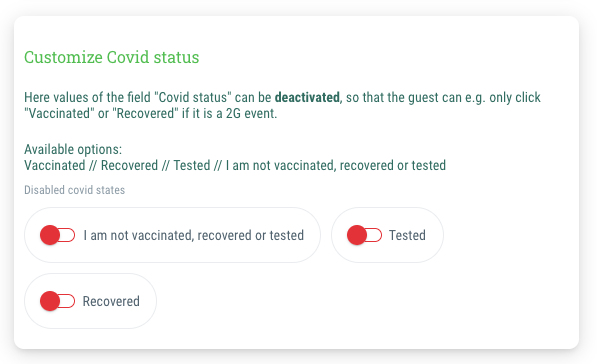
Free text input field - Covid status
Selecting the corona status - find out how you can influence which options are displayed below.