Guest details

Master data, accompanying persons, orders ...

Here you can find out how to view and edit the guest's master data, orders and all other important data.

Du kannst für das guestoo Back-End zwischen zwei Darstellungsoptionen wählen. Die Screenshots in der Doku basieren auf dem "Klassischen Design".
Hier siehst Du die Unterschiede, damit Du dich auch im "Modernen Design" zurecht findest: » guestoo Back-End-Design

To access the details of a guest, proceed as follows:

  • Go to the “Guests” tab of the event
  • Search for the desired guest and click on the cogwheel symbol next to their name
  • Select the menu item “Edit”
  • You will be automatically redirected to the details of the respective guest
 
Bulk actions

If you want to edit the data of several guests at the same time, proceed as follows:

  • Mark all desired guests with a checkmark
  • Click on “Selected (X)” on the top right
  • Click on “X Edit guests”
  • A dialog window opens in which you have the option of editing the data of all selected guests at the same time


The management options available to you in the various tabs are explained below.

Registration

Registration -
Registration link

Here you can find the individual registration link for the guest.

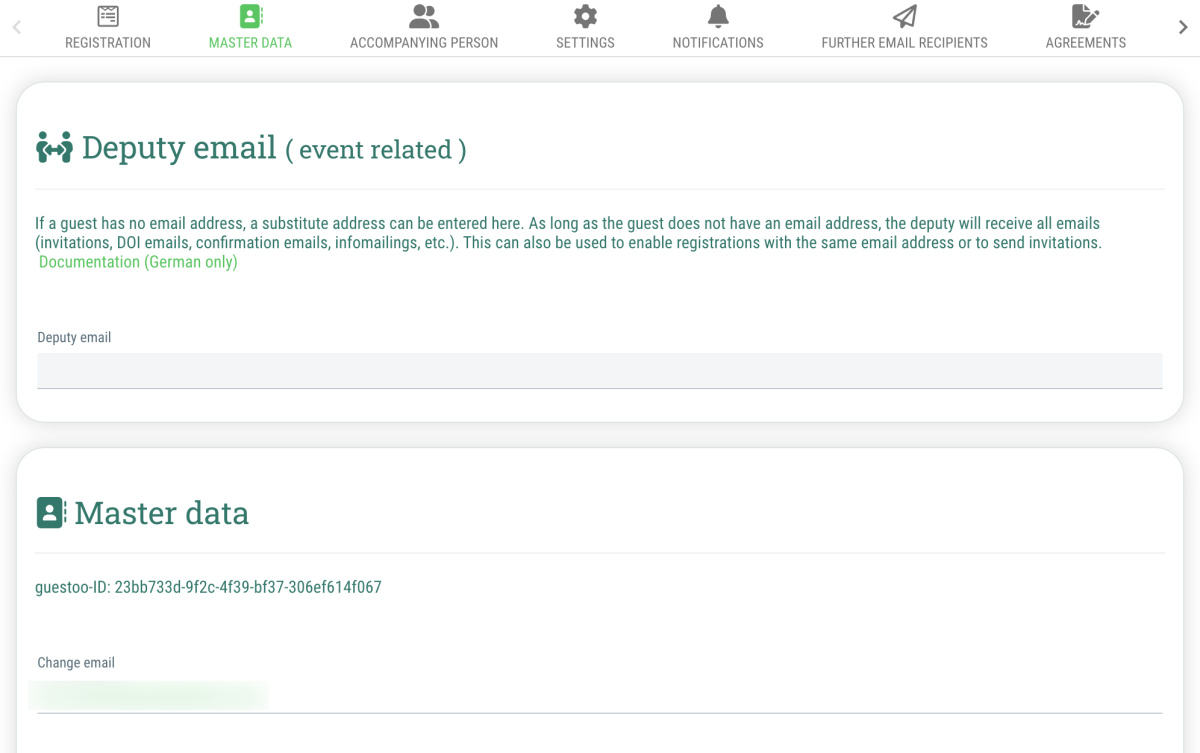
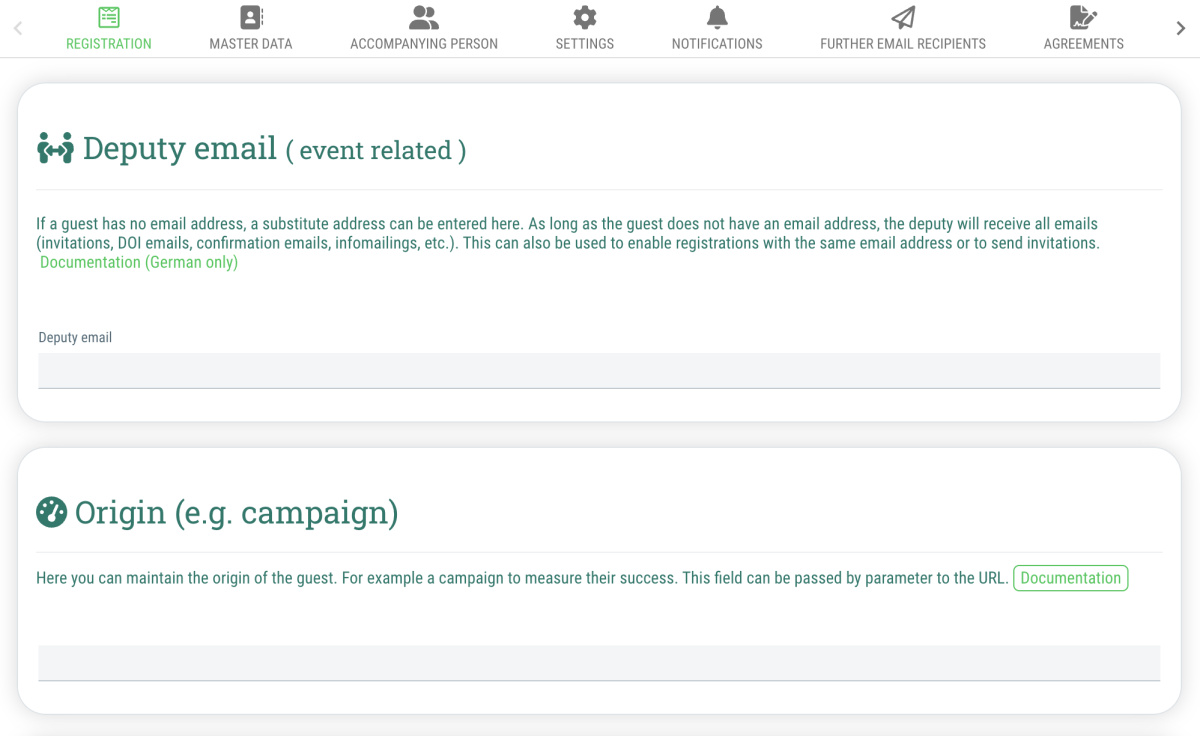
Deputy email (event-related)

If a guest does not have an email address, a deputy address can be specified here. As long as the guest does not have an email address, the deputy will receive all emails (invitations, DOI emails, confirmation emails, info mailings, etc.).

This can also be used to enable sign ups with the same email address or to send invitations.
You can find more information on the use of deputy email addresses here.

Origin (e. g. campaign)

Here you can maintain the guest's origin. For example, to measure the success of a campaign.

Sub events

Here you can find any sub events that the guest may have signed up for.

Event-related information
  • Individual guest text module
    Here you can specify an individual text module that you can then insert as a placeholder in the event page or mailings.
  • Internal note (Event)
    Here you can specify an internal note that will be displayed at check-in and can be edited.
Public profile

Here you can see whether the guest currently has their public profile displayed.

You can change this status by using the toggle (green = displayed, red = not displayed)
Master data

Master data -

Here you can view and edit the guest's master data.

These include:

  • Deputy email
    If a guest does not have an email address, a deputy address can be specified here. As long as the guest does not have an email address, the deputy will receive all emails (invitations, DOI emails, confirmation emails, info mailings, etc.).
    This can also be used to enable sign ups with the same email address or to send invitations.
    You can find more information on the use of deputy email addresses here.
  • All master data (also those hidden in the registration form)
    If you create a guest manually, you can maintain their master data before inviting them to save them time when signing up. However, they have the option of adjusting their data in the registration form. If an error has been made when a guest signed up, you can correct their details here after they have registered.
  • Language
    The guest has the option of selecting their language in the guest dashboard. The guest's choice may override the language you have set here (e.g. in emails). To ignore the language set by the guest and use the language set by you, you can make the corresponding selection.
  • Tags and campaigns
    Here you can assign keywords and campaigns to the guest

Accompanying person

Accompanying person -

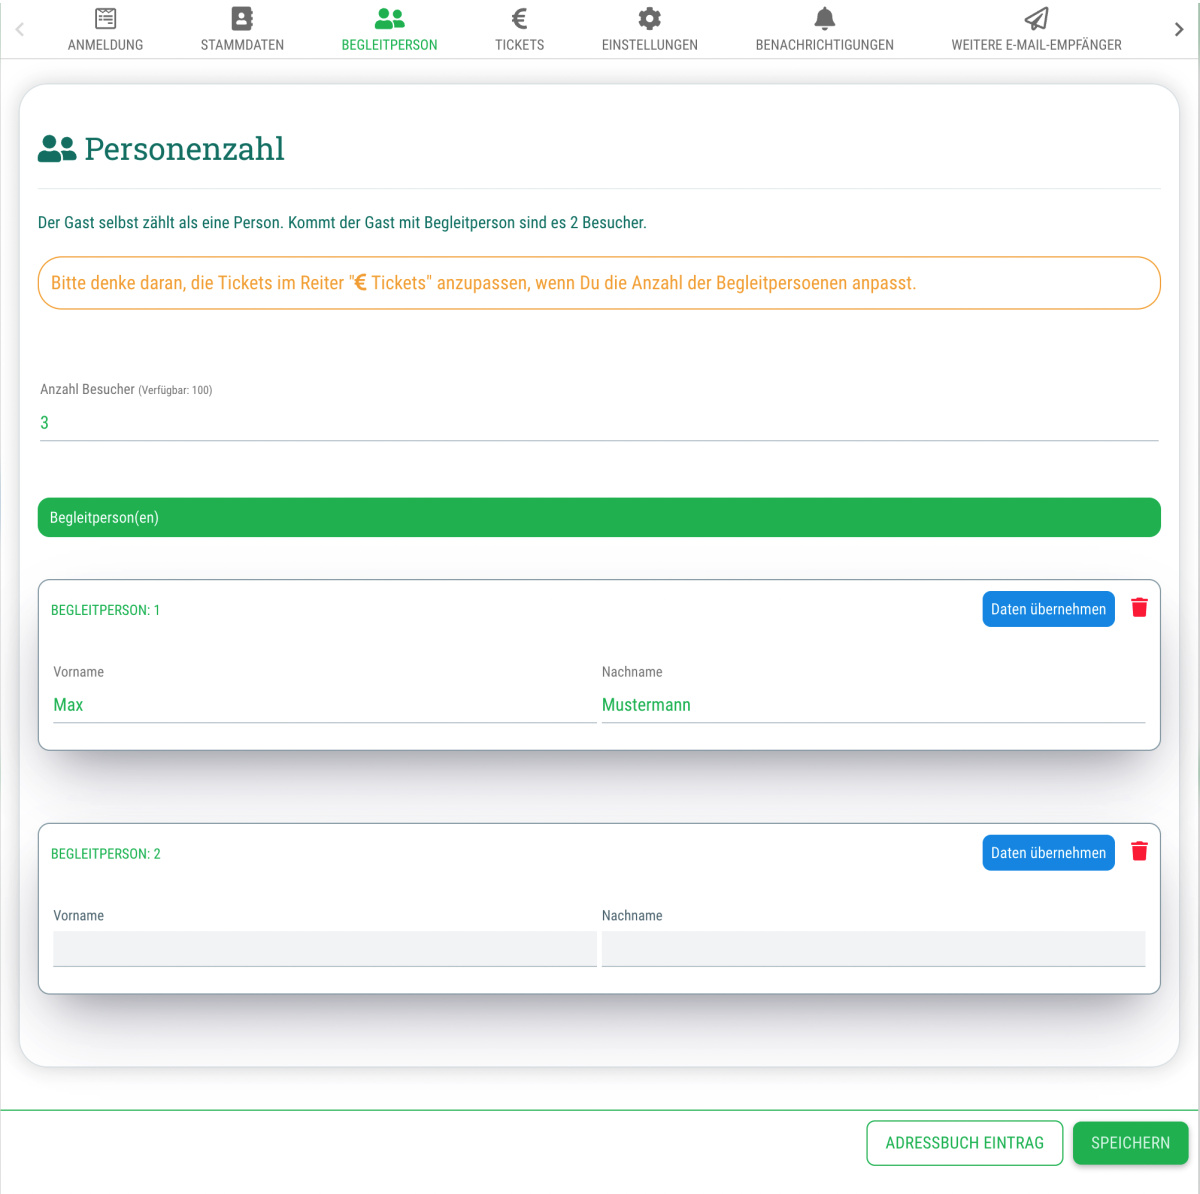
Here you can view the accompanying persons that the guest added when signing up and add further accompanying persons to the guest if you wish.

This is how it works:

  • In the “Number of visitors” field, enter how many people (including the main guest) belong to the guest's sign up
  • Note: If the guest attends alone, enter a “1” here.
  • If you enter a higher number here, you also have the option of immediately adding an accompanying person to the guest
  • To add an accompanying person, enter the person's first and last name
  • In order to delete an accompanying person that has already been added, click on the trash can icon next to the corresponding companion
  • Note for paid events:
    For events with paid tickets, remember to adjust the tickets in the “Tickets” tab accordingly if you add or remove any accompanying persons!


Tickets

Tickets -

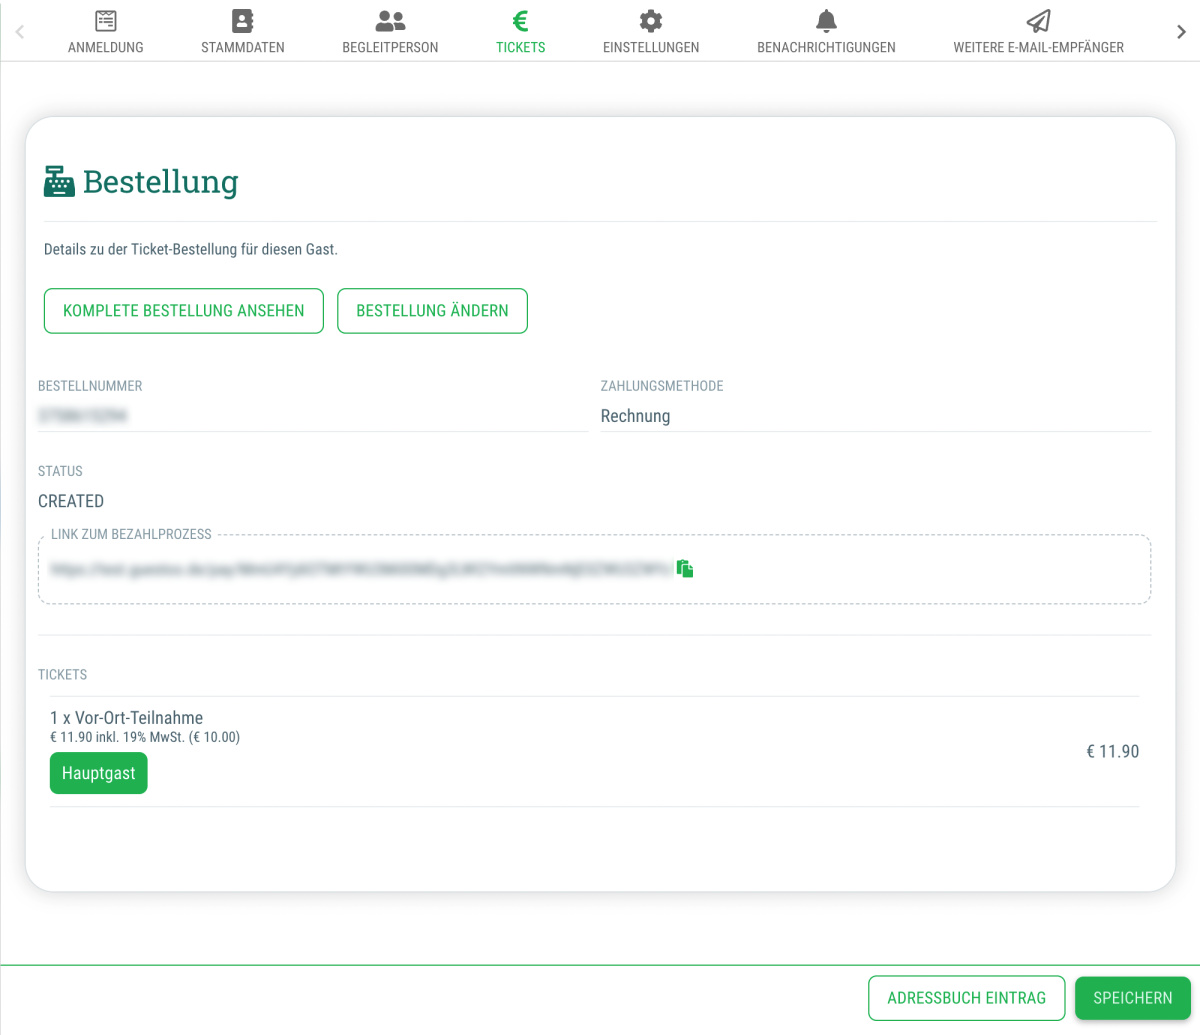
In the “Tickets” tab, you can view the guest's order and adjust it accordingly if you wish.

You have the following options:

View entire order

Clicking on this button will take you to the order details. There you have the option of specifying a voucher number and/or a voucher code, marking the order as “Paid” or canceling it.

Change order

Here you have the option of customizing the guest's order. For example, you can add other or additional tickets to the guest's order.

This is how it works:

  • Click on the "Change order" button
  • Choose the desired ticket(s)
  • Click on "Save"
  • Important notes on changing orders:
    After you have changed and saved an order, the following happens:
    • The existing order is automatically canceled entirely!!
    • A new confirmation e-mail will not be sent automatically. This must be triggered manually by you.
    • The new order is initially set to “Unpaid” - if the guest has to make a payment, you will find the URL for the payment process in the finished order after you have clicked on “Save”.

Settings

Settings -

Here you have the option of making further settings for the guest.

These include:

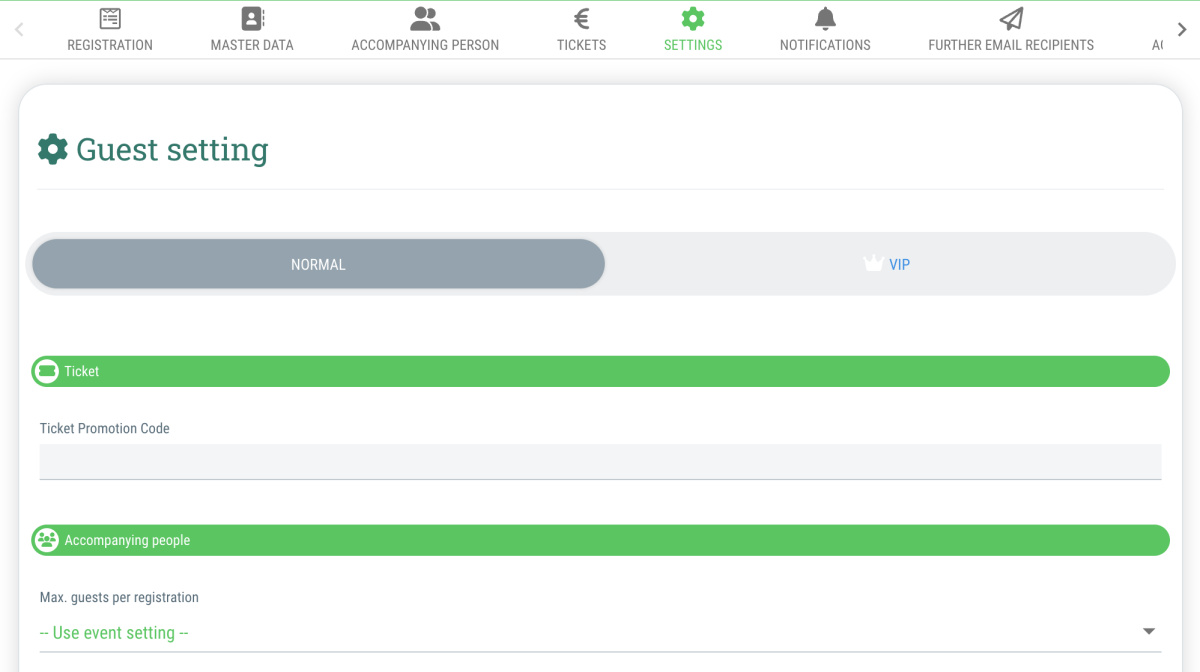
Guest setting
  • Normal / VIP
    Select whether the guest is a 'normal' guest or a VIP guest. The setting is only made for the respective event!
  • Ticket Promotion Code
    Here you can enter a ticket promotion code in advance. This will then be automatically applied to the guest's registration/order.
  • Max. guests per registration
    Here you select whether and how many accompanying persons the guest may bring along. You can either set a number yourself or keep the “Use event setting” option.

    Note: The main guest also counts here. This means that if the guest is allowed to bring an accompanying person, you must enter a “2” here.
  • When

    Here you can define from and until when the guest may sign up for the event.
    Use this setting to allow special guests to sign up for the event before the start of registration or even after the registration deadline has already expired.


    Note: If you do not make a setting here, the registration period that you have set at the event under Info > When will be used as a fallback (Documentation).
Activate event-specific fields

In the “Form” tab of the event, you can create event-specific fields and assign a code to them. Only guests who are assigned the code here can see the field. For example, you can offer special options only to selected guests.

In order to do this, simply click on the desired code to assign it to the guest.

Email sender settings

Here you can set specifically for the guest which email address should be displayed as the sender for the emails that you send to them through guestoo.
In order to do this, activate the option "Overwrite event settings" and then enter the following data:

  • Sender name
    Here you enter the name that should be displayed as the sender, e.g. Max Mustermann, Mustermann Events, etc.
  • Sender
    Here you enter the part of the email sender address that comes before the @. If the sender address should be invitation@guestoo.de, you would enter “invitation” in this field.
  • @ Domain
    Here you select the desired domain, meaning the part of the email sender address that comes after the @. You can find out how to use your own e-mail domain as a sender on this page.
Guest access

Here you will find an overview of all relevant URLs and codes for the guest.


This includes:

  • Invitation link
  • Cancellation link
  • Check-in link
  • Guest-ID
Sample guest

Here you can specify whether the guest is a sample guest.

You can use sample guests to allow certain groups of guests to sign up using the same invitation code.
This can then be used for registration X times and every guest who signs up will have the same default settings you have set up on the sample guest (e.g. certain event-specific fields, permission of accompanying persons, ticket promotion codes, tags, etc.).


Sample guests are not real guests, but serve as a sample for signing up real guests!

Further information on creating and managing sample guests can be found here.


Notifications

Notifications -

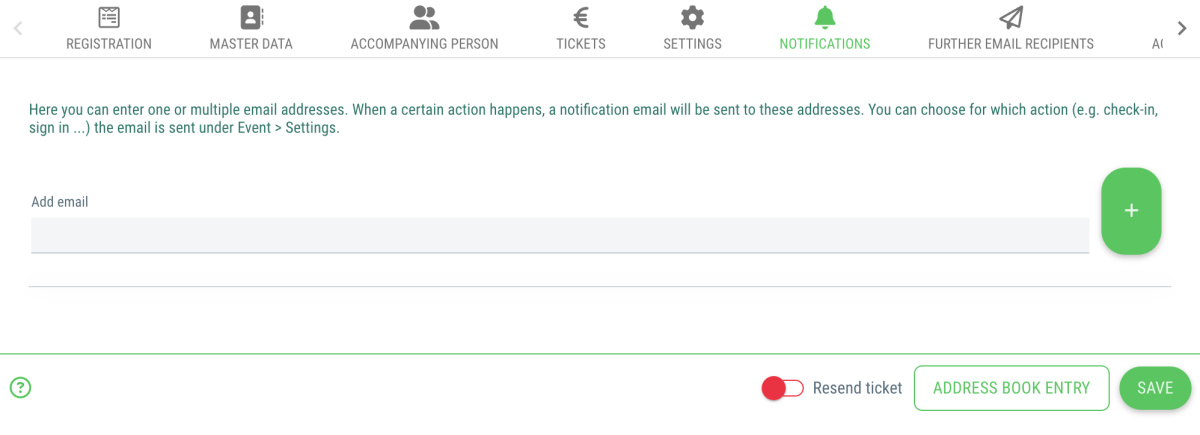
Here you can specify one or more email addresses that will be notified as soon as a certain action occurs.

You can set the action (e.g. check-in, sign up, ...) for which the message is sent in the event settings. You can find out how this works here.


This is how you specify one or more email addresses for notification:

  • Go to the guest details and switch to the “Notifications” tab
  • Enter the desired email address in the input field
  • Click on the “+” to add the email address
  • Click on the "Save" button below
  • Done!
  • In order to remove an email address that has already been added, simply click on the minus symbol next to the corresponding email address

Further email recipients

Further email recipients -

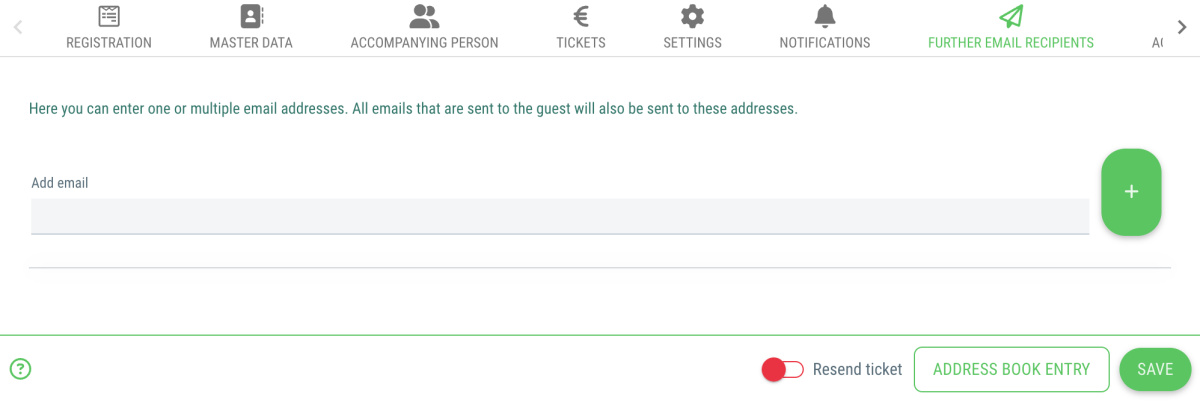
Here you can specify one or more email addresses. All emails sent to the guest will then also automatically be sent to the email address(es) entered here.


This is how you add another recipient email address:

  • Go to the guest details and switch to the “ Further email recipients” tab
  • Enter the desired email address in the input field
  • Click on the “+” to add the email address
  • Click on the "Save" button below
  • Done!
  • In order to remove an email address that has already been added, simply click on the minus symbol next to the corresponding email address

Agreements

Agreements -

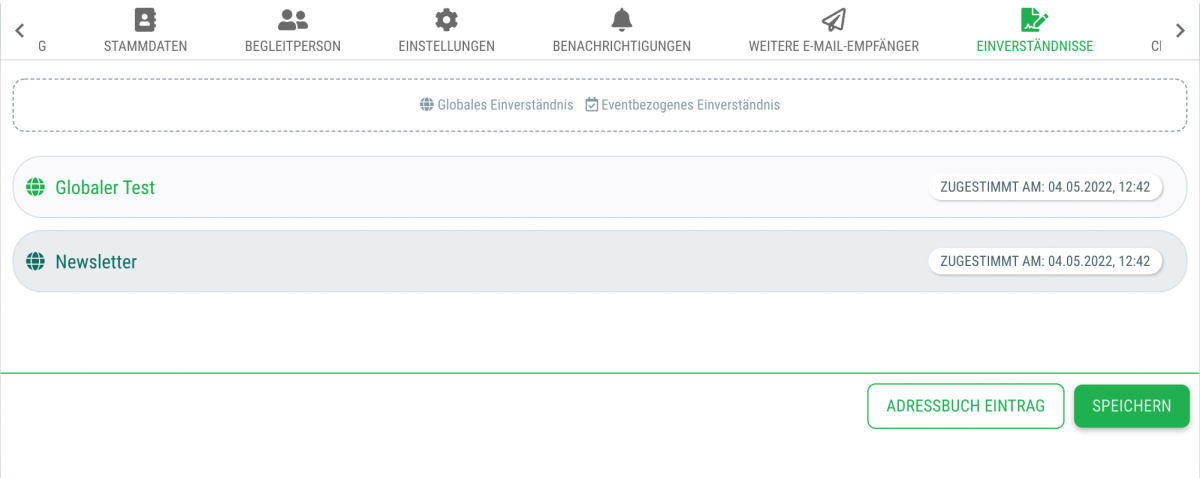
Here you can see which agreements the guest has given their consent to.

You can find more information on creating declarations of consent here.

Check-in details

Check-in details -

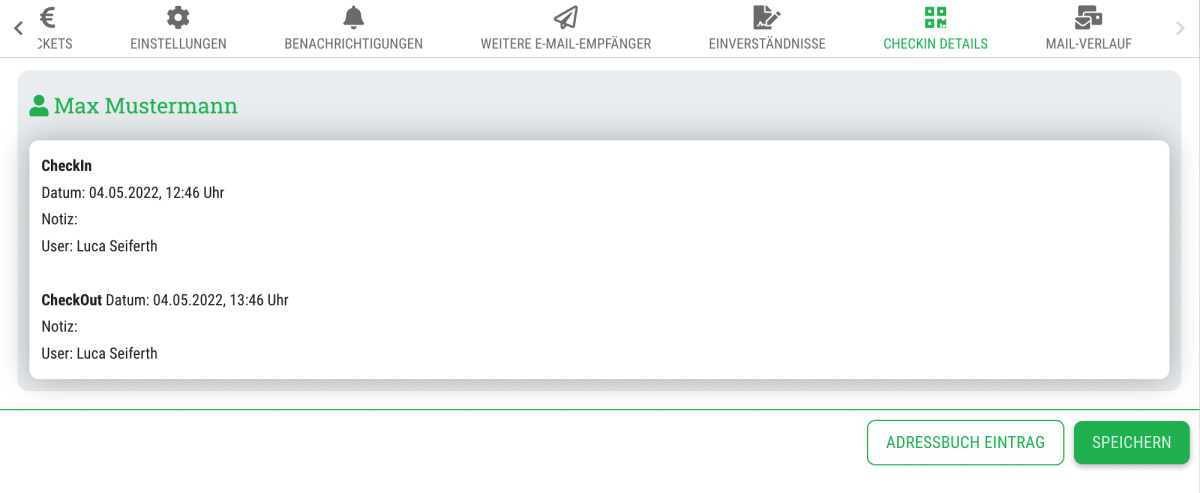
Here you will find the history of the guest's check-ins and check-outs for the respective event.


The exact time (date and time) of each check-in and check-out is displayed, as well as the manager user who carried out the check-in/check-out. If available, the guest's internal note is also displayed here.

Email history

Email history -
  • Here you can see an overview of all e-mails that the guest has received via guestoo
  • The date and time at which the e-mail was sent is displayed next to the title of the corresponding e-mail
  • There is also an icon to the left of the email title. This is what the different symbols mean:
    • Paper airplane symbol: The email was sent successfully
    • Warning symbol: The email could not be sent
    • Hourglass symbol: The email is currently in the queue and will be sent out shortly